Pinterest does a lot of things…the biggest is providing you with endless amounts of inspiration and ideas through your pins!
Thanks, in part to Pinterest, at our last dinner club, some of the ladies got to talking about upholstering headboards. Two, in particular, really wanted to do it for their rooms but just hadn’t made the time.
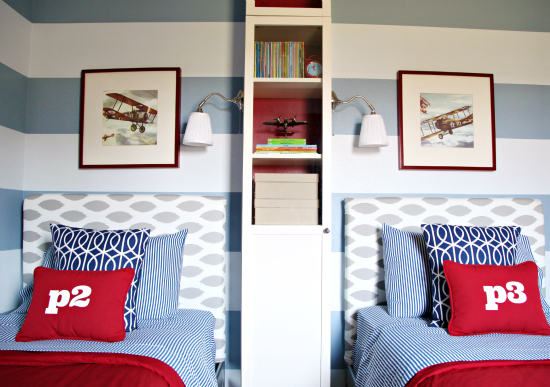
So, being the “do-er” that I like to think I am {yes, even that made ME laugh out loud, Mathlete…and others}, I scheduled a headboard day. The week before our “headboard day” came and there were lots of emails and texts. We all wanted super simple rectangular boards similar to this one
On Saturday morning, Liz texted me to find out if I had really gone and bought the wood. {Sorry Liz…I fibbed just a bit. We were in the car on our way to get the wood but I was afraid you might back out if I told you that!} Mathlete and I hit up Lowes and bought the plywood for our projects and had it cut there. I also picked up a second staple gun and a ton of staples in different sizes.
Liz was given batting duty since neither Nari or I had actually gone and bought batting yet. {Maybe we were all subconsciously thinking the other was going to cancel?}
With all of our supplies purchased, we got to work making our 3 headboards {I will warn you…you will see two different fabrics in the how-to pictures because we were making multiple boards}!

Supply list:
– 1/2 inch plywood {ours were cut to 62″(w) x 30″(h) for our queen size beds)
– 1 2’x4’x8′ piece of lumber
– 3 yards of batting*
– 3 yards of fabric*
– Staple gun
– Staples
– Drill
– Screws
– Spray adhesive {optional}
*You will have extra using getting this amount but I live by the “better safe than sorry” rule.
Making/Attaching Legs
Ok, so the first thing we did was make and attach our legs. If you don’t want legs {i.e. you are going to hang it on the wall} you skip this part.
We used my existing bedroom headboard {also a queen} as a guide for how long to make the legs and where to mount them.
– First, measure from the floor to the top of the mattress. {Mine was 28″}
– Second, measure from bottom of the headboard up to the top of the mattress {Mine was 5″}
Using those two measurements, we determined that I wanted my headboard mounted 23″ from the bottom of the leg.

We {and by “we” I mean Mathlete} cut our 2’x4’s to 32″ long to make sure we have extra there for stability.

Then, Mathlete just drilled the legs onto the plywood.

Upholstering the Headboard
The first thing to do is iron your fabric. Despite knowing this day was coming, not a single one of us did this before that afternoon. Heehee…I’m not exactly besties with my iron anyways.

Now, lay your fabric out on a clean surface. Mathlete made us use a plastic tarp on top of the basement carpet so we didn’t mess up his carpet. I guess staple guns are notorious for stains in his world 😉

On top of your fabric, lay out your batting. Leave about a 6 inch overhang of fabric on each corner. This doesn’t have to be exact and you can totally do more but you need some overhang.

When laying your stuff down, make sure you have the pattern the way you want and that it is straight. Position your piece of wood on top of the batting face down. {some people spray the batting with spray adhesive but I never have}
The leg area is a little trickier than the rest of the headboard so I like to do them first. I knew I was going to wrap my legs with additional fabric so I just cut along the side of the leg up to the bottom of the headboard.


Then, I wrapped the fabric up and stapled it.

The excess leg fabric and batting just got stapled to the front of the plywood.

The sides are done identical to the bottom. Wrap it around and staple it down.

For the corners, we essentially wrapped them like we would a present.


Once you have the main area of your plywood wrapped, technically, you are done! We all had different plans for our legs so Liz and Nari took their headboards home.


I took some of my excess fabric and folded the top and bottom. Then, I wrapped it around my legs and stapled it along the back of the 2’x4′.


Now, to attach your headboard, simple drill screws through the holes in the bed frame directly into your legs.


Total Cost for this Project {definitely depends on fabric choice but here is a basic cost rundown}:
1 sheet of plywood – $13.97
1 2x4x8 – $3.97
3 yards of batting – $21.00–>with our coupon $8.40
3 yard of fabric – $15.00
Total: $41.34
**Obviously, this depends greatly on the fabric you choose. Mine was $18/yard but the one Liz and Nari used was only ~$5/yard.
Lessons Learned:
– Liz is smarter than I am. Seriously, I didn’t even consider the way I was wrapping the side of my headboard that would be visible from the door of the bathroom room and cut away the excess fabric. So, I had to make a little panel from fabric and staple it on so none of the upper part of my leg was visible.
Liz’s way…so much better


– Nari has the best tools! I had purchased a new staple gun and, frankly, it sucked. Nari busted out her electric staple gun and I was in heaven.

Have your been working on any DIY projects? Inspired by Pinterest recently?


I LOVE this! It turned out so so adorable! Thanks for sharing.
Simplest tutorial I’ve seen for this kind of headboard, and I’ve been looking for a while! Pinning this for when hubby and I redo our bedroom!
Accidentally Wonderful recently posted…Mini Egg Rolls
Your headboard looks great! I love the fabric… my favorite colors! I feel your pain with staple guns… I have been through about 6! Then my husband bought me this little cheap pneumatic one, thinking that if I broke that one too, at least it didn’t cost an arm and a leg! And so far I haven’t thrown in across the room haha!
Jenny recently posted…DIY Upholstered Headboard for Guest Bedroom
Very pretty! You made it look so easy to do!
DeDe@DesignedDecor recently posted…Talkin About Thursday Link Party #9
Wow! Great project ~ Thanks for all the step by step pictures, too!
I found you today from the Link Up at Live Laugh Rowe, where I’m #184. I hope you stop by my blog and leave a comment, too!
~ Megin of VMG206
Just lovely! I love the fabric~ I too made some heard boards very easy too! I am your latest follower via feed burner & I hope you will follow me too!
Gorgeous fabric, and you guys did a fabulous job making those! Thanks for sharing!
Jessi @ Practically Functional recently posted…Twine Wrapped Bottles
Beautiful fabric, awesome DIY and gorgeous headboard! Love it!
Roeshel recently posted…DIY Spring Sign
Beautiful fabric choices and awesome headboards!
What beautiful headboards! I Heart Organizing always has amazing inspiration, and you did an awesome job with the project! I found you at A Bowl Full of Lemons– thanks for sharing!!
~Abby =)
Abby @ Just a Girl and Her Blog recently posted…How to Make Pretty Labels in Microsoft Word + FREE Printable
ok, you did an amazing job!!! i love it:)
xoxo
ashley recently posted…Tell Me Tuesday/Link Party
Love it! We made our headboard in our Master bedroom too with a matching bedskirt. You did a great tutorial! Love the fabric choices!
Krista
Krista recently posted…Decorating for Spring on my FAUX Fireplace Mantel
Hi Shanna,
I should have clarified… I made a faux bedskirt… it is really only strips of matching fabric that I cut and hemmed with no-sew hemming tape… then made smaller strips for the corners…. then duct taped (yes, I said duct taped) the whole thing to the top of the boxspring so you can’t see the duct tape. Just looks like a custom matching bedskirt. Haven’t written a tutorial yet but need to do that one day:) You could do it easily! Thanks for replying,
Krista
Krista recently posted…Welcome Spring: Decorating in the Dining Room